Another project for my Hunter Machine was to test these floppies that I can now make. I don’t want to keep this huge box sitting around so during the stripping process I kept the main board, keyboard, power supply, and power distribution block. I plan to either cram it into a computer case or make something for it. From what me and AUS understand we can easily run my setup off a regular power supply since I only need 5/12v. Only the sensor heads need 48v. But from recent learning you can get 48v off of a regular power supply without modifying anything. I haven’t touched into it so no other info to share about it just yet.
The biggest challenge was the CRT monitor. A huge, heavy mass of glass that I did NOT want. The machine came with a bunch of CRT monitors and the guy told me they used them with the machine. So I figured connecting up a regular monitor would be cake. Boy was I wrong… apparently they were scavenging the CRT monitors for parts to repair the one in the machine.
My initial thoughts was to just wire up a VGA cable since the schematics I received from AUS simply has R, G, B, Ground, and two sync cables. I grabbed an old vga cable and split up the wires, confirmed the pinouts and got to wiring. That only left me with a bunch of wasted time. AUS confirmed the board puts out a digital signal the crt converts later down the line. VGA is strictly analog… sounds ass backwards being so old vs. new technology but thats whats going on.
So the researching ensued. Weeks of it. I found this gem in a random post on a forum dedicated to restoring old arcade games.
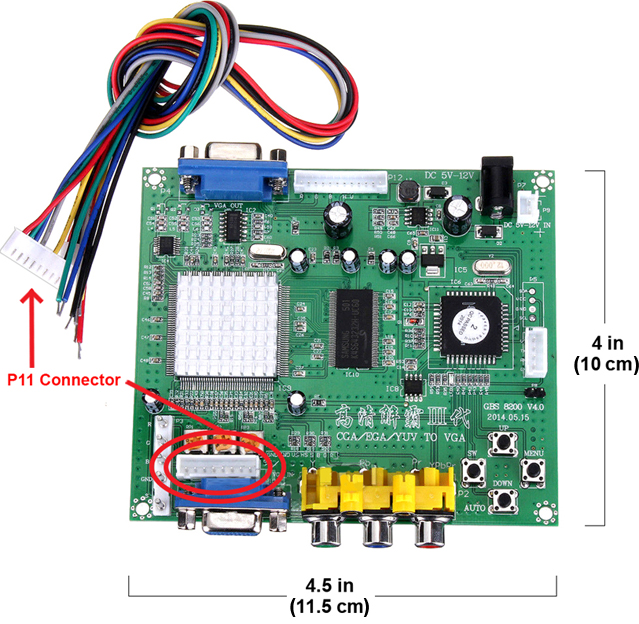
The GBS8200(http://www.ebay.com/itm/281880841398). $19 of Chinese ingenuity. Takes a video signal from any sort of old device and converts it into vga. It offers resolution, scaling, and some other adjustments. I didn’t find much use for the “auto” in this project. It only gave me a blank screen.
There was a guy that connected an old Roland 50-S keyboard to the thing and got it to display on a screen so I figured that was the ticket.
AUS opted to fund this little adventure for me and I thank him. I ordered the card and waited for it to arrive from Ca.
Upon arrival I ripped it out of the packaging like a kid opening Christmas presents. Connected it up to the 8 pin coming off my board, flipped everything on… and nothing. So I went menu surfing… first changing the language to English. Changing resolutions and noticing the Geometry option didn’t work on RGBHV mode… weird. Went to the packaging and there was no manual. Figures. Went googling and found a bit on the device. Nothing that was very helpful for my purposes. There is a bit of a knowledge base someone else put together here: http://forum.arcadecontrols.com/index.php?topic=123399.0


Tried moving the S cable over to the H-sync pin but that didn’t work. At that point I had spent a bunch of time dicking around and the girlfriend was waiting to leave. Whoops.
Next comes about a weeks worth of time trying every possible combination of wires, then jumper settings, and even more display and mode settings on the card. Come to find out mid-way through about the jumpers on the board thanks to AUS. You can change from H/V to H with composite sync. And change the polarities of the sync’s. So now you can see where my time went trying everything. Some configurations gave me blank screens, no 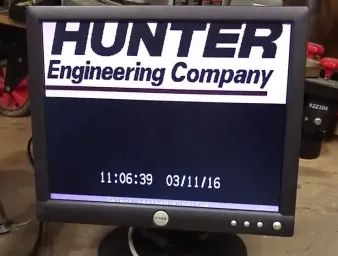 display, text scrolling fast, one trippy one with an S shaped but readable display, and readable text partway off the screen that wouldn’t update unless you changed mode or resolution. Upon one configuration with the jumpers and connections I got it… a BLINKING CURSOR! It was almost as it was zoomed in as I could only see the center of the screen. I was so excited I grabbed the phone and took a vid for AUS.
Then another several hours later on another day I found the magic combination. My hacked vga cable, correct jumpers, and rgb mode on the board and some wacked out settings on the geometry. I had 99% of the screen. For the life of me I could not get the top and the bottom to show up completely… either one was gone and the other looked good or vise versa. I opted for the middle of the road so I could see everything. And there we go folks. Thats a good enough moment for me.
So on to the part where I tell you how to do this. As im sure thats how you wound up finding this bit. Im just going to go over the basics of the wiring. How you connect the wires and finish the job to make it perdy is up to you.
- You will need a VGA cable you’re not attached too. You will cut this
- GBS-8200/8220. Same thing – one has a 2nd vga out.
- Multimeter – possible contunity testing. Depends on #2
- Time
- Female jumper wires, or Female to Female jumper wires(http://www.ebay.com/itm/321976330659)
- First up cut an end off the vga cable and separate everything. Give yourself some space to work as theres a bunch of stuff inside… good 6-8″ should suffice.

- Your wiring colors may differ from mine inside the VGA cable. Colors inside the VGA cables will vary so you will have to find the pin/wire. You’re hunting for pins
1 – Red
2 – Green
3 – Blue
5-10 – Ground. Connect all together
13 – H-Sync(or composite)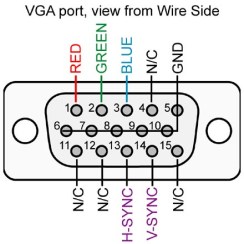
- Unplug the CRT cable from the Hunter mainboard. The pinout is as follows for your connections. I had female to female jumper wires so I just cut them in half.You’re working on J6 C VIDEO.
- H Sync – Connect H Sync on your VGA cable to this pin
- V Sync – Also connect H Sync on your VGA cable to this pin(1-2 on hunter side together)
- Ground – Connect this to the grounds on your VGA cable
- Blue on VGA cable
- Green on VGA cable
- Red on VGA cable


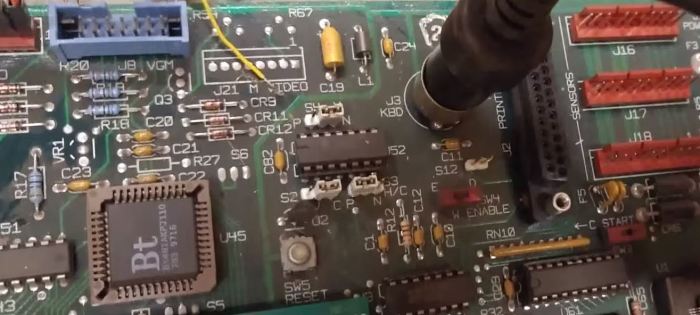
- Change the video pins on your mainboard. You will need to change jumpers S2, S3, and S4
- S2 – move to the right two pins
- S3 – move to the left two pins
- S4 – move to the right two pins
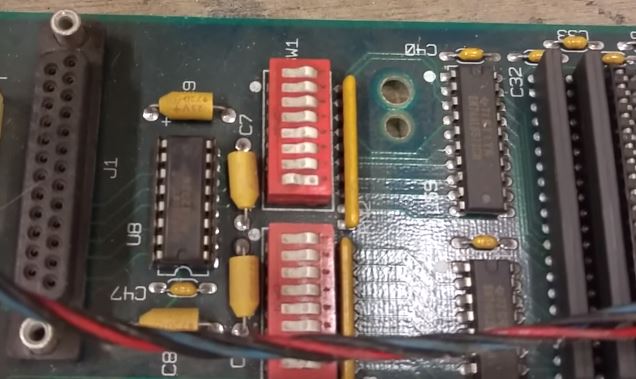
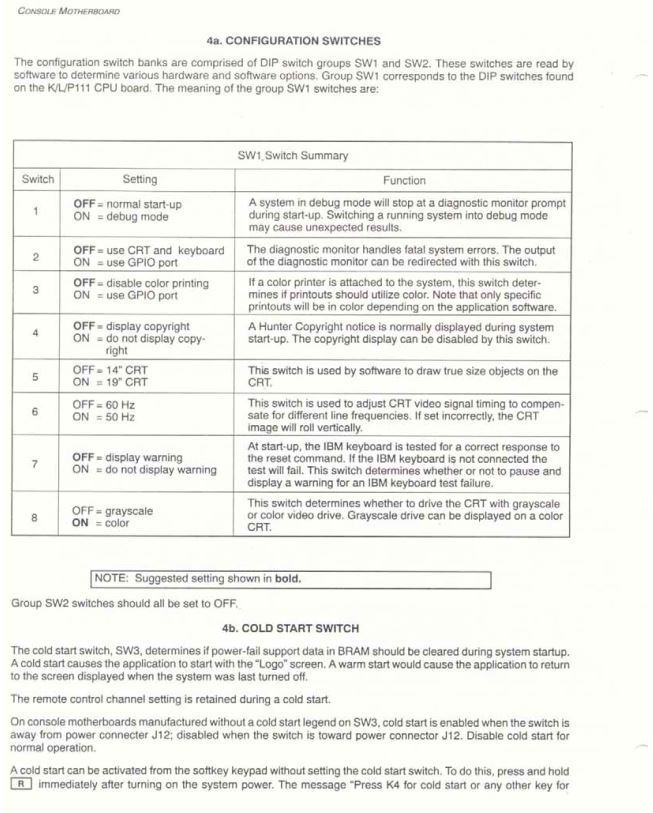
- Change the switches on your mainboard. You want all but #8 clicked in the up position.
- Connect the 8200 to power. My board can use 5-12v. Make sure on the boards voltage before you connect. For my purposes I just crammed them under the floppy connector. I didnt have anything handy that would fit.
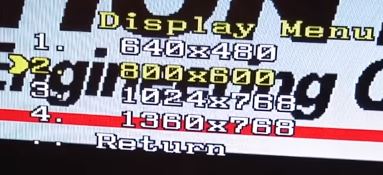
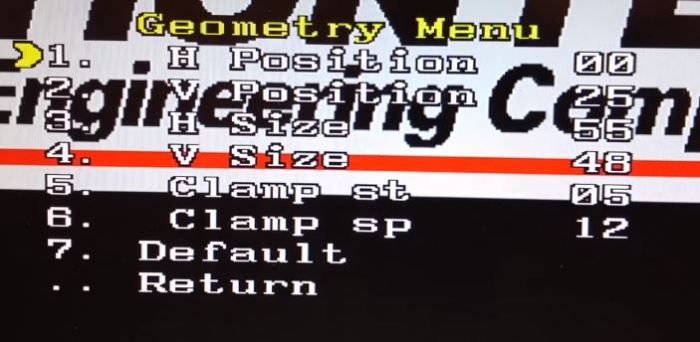
- Power everything up. Change the video board to RGBS? mode. Change the display resolution to 800×600 and the geometry settings I used are below. Yours may differ but that should give you a starting point.
- And there you have it! Old junk running on a new screen.
Edit(Info on the switch positions)
hunter k111 111 alignment machine lcd screen replacement
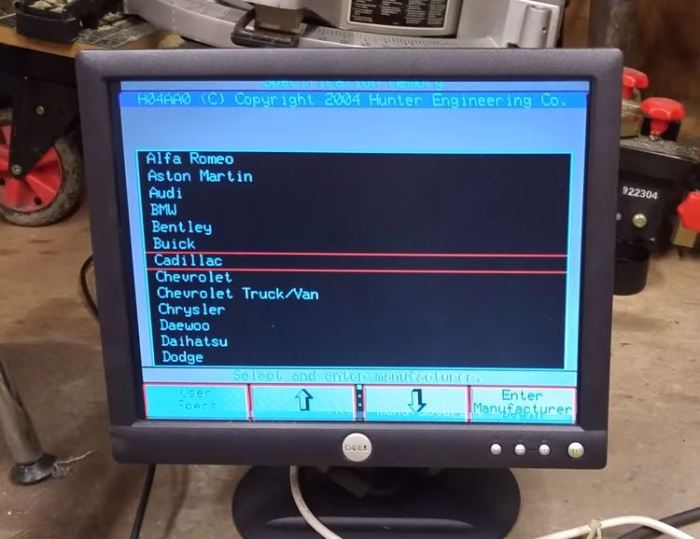
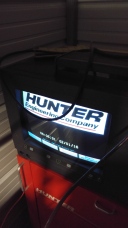 So here we go. 1st boot on a non-hunter issued floppy. My friend in Australia says im now the only guy that can do this. Rock on.